Setting up some linters for my projects
To ensure proper formatting of my projects, I want to setup some linters. For now, most of my projects use html, css, js, jsx, md, json, yaml, toml, makefile, c, rs, cpp as content.
For starters, I installed Prettier which worked quite well, but not well enough to set a standard for all my projects. I want a standard for all my projects, and a single google search led me to editorconfig.
EditorConfig would help with the standardization, and also resolve the issue with tabs, space, tab-width that I was having in VSCode.
Setting up EditorConfig
The setup process is simple, with installing the EditorConfig for VS Code extension.
To generate a .editorconfig file which contains the workspace settings for EditorConfig, right-click on an empty space on the Explorer panel and “Generate .editorconfig”
That will generate a default .editorconfig containing a few lines of global configuration. However, this much is not enough. I want some specific configurations to apply to all my projects.
To achieve that, I created a editorconfig.template which contains all my configurations.
# EditorConfig is awesome: https://EditorConfig.org

# top-most EditorConfig file
root = true

[*]
indent_style = tab
indent_size = 4
end_of_line = lf
charset = utf-8
trim_trailing_whitespace = true
insert_final_newline = true


[*.txt,GNUmakefile,makefile,Makefile]
indent_style = tab
indent_size = 4

[*.{diff}]
trim_trailing_whitespace = false
insert_final_newline = true

[*.{js,json,html,css,sass,py,md,markdown,c,cpp,rs}]
indent_style = tab
indent_size = 2

[*.yaml]
indent_style = space
indent_size = 2
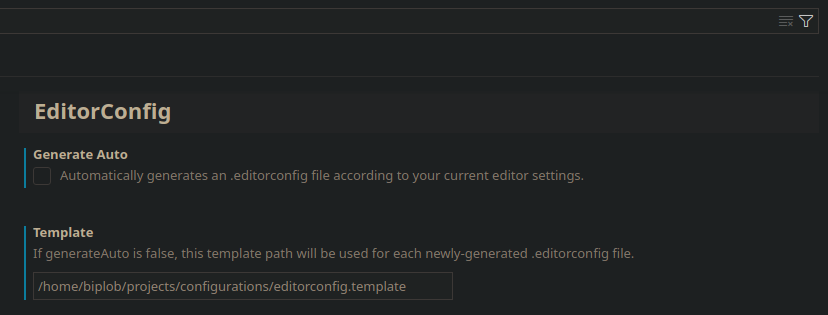
This template file is used to generate the .editorconfig instead of the default template.
To achieve this, modify the EditorConfig settings in VSCode:
- Auto generation must be disabled
- The template path must be added
Setting up ESLint
Now the next step was to setup ESLint for the JS (Node/React) projects, which are among the majority.
Installing ESLint as a dev-dependency
npm install -D eslint
Once that is done, let’s generate the .eslintrc.json (I like JSON!)
npm init @eslint/config
Then, just follow through the generation scripts to ensure proper linting rules.
Example .eslintrc.json
{
 "env": {
  "browser": true,
  "es2021": true
 },
 "extends": ["eslint:recommended", "plugin:react/recommended", "prettier"],
 "overrides": [],
 "parserOptions": {
  "ecmaVersion": "latest",
  "sourceType": "module"
 },
 "plugins": ["react"],
 "rules": {
  "indent": ["error", "tab"],
  "linebreak-style": ["error", "unix"],
  "quotes": ["error", "single"],
  "semi": ["error", "always"],
  "react/prop-types": "off"
 }
}
Setting up Prettier
Mostly Prettier works good with ESLint, but there are situations where some conflicts arise.
To avoid those conflicts, install eslint-config-prettier
npm install -D eslint-config-prettier`
Add "prettier" in .eslintrc.json file.
{
 ...
 "extends": [..., "prettier"],
 ...
}
On top of that, adding some custom rules to Prettier in prettierrc.json
{
 "semi": false,
 "overrides": [
  {
   "files": ["*.js", "*.css"],
   "options": {
    "trailingComma": "es5",
    "tabWidth": 4,
    "semi": true,
    "singleQuote": true
   }
  },
  {
   "files": ["*.html", "legacy/**/*.js"],
   "options": {
    "tabWidth": 4
   }
  }
 ]
}
And, with that the setup of linting for my projects is complete. For now.
But, this also creates some more inconveniences:
- Need to install
eslintandeslint-config-prettierfor my JS projects and generate the configuration, or COPY/PASTE from some other already-configured project. - Create
prettierrc.jsonfor Prettier configuration, and COPY/PASTE from some already-configured project.
Let’s automate this some other time.