Theming my Jekyll Github Blog
Themeing the Blog
Till now, I’ve been using the default Jekyll theme: minima. This was good enough for my my use, yet it was a little too outdated to my taste.
The idea was to customize the theme a little bit, adding a splash of colour while retaining the simplicity of minima.
Custom CSS to add color
Initially, I stared the theming with injecting custom CSS into the site, but this was a tedious process and more labour intensive that I wanted to exert, which meant, I needed to find other ways to theme.
With that idea in mind, I started looking at other themes. I liked a few, but again the same issue arose. I was comfortable with Minima and it’s no-hassle philosophy. I wasn’t about to exert additional effort into a new theme.
Updated Minima
The laziness led me back to Minima’s GitHub page in search for the current development version of Minima. I could use that instead of the latest stable release, which at the time of writing was v2.5.1
The latest stable release was on 2019 (3 years ago, at the time of writing) which was too old, really.
However, this also meant that the development version for the next major release (v3+) had to have some good improvements in features and styles for me to use. So, I stayed with Minima, but updated to the latest version.
Setup and Configuration
GitHub Pages
Since there is no release yet for v3+ for minima, I couldn’t directly use that. Thankfully, GitHub Pages automatically fetches any remote-theme from a repository if the link is provided.
In _config.yml the remote-theme is added.
remote_theme: jekyll/minima
Local Dev Env Setup
Instead, setting up my local development environment was a little trickier. By default, Jekyll doesn’t fetch the remote theme. To achieve that, I used the Jekyll Remote Theme Plugin.
Custom CSS
Minima v3+ required a little change in the project structure. Among them, first was to include a style.scss inside assets/css/ folder. This would import all the styles from the theme, and would be applied to the blog.
Any other custom styles went inside _scss/minima/custom-styles.scss file.
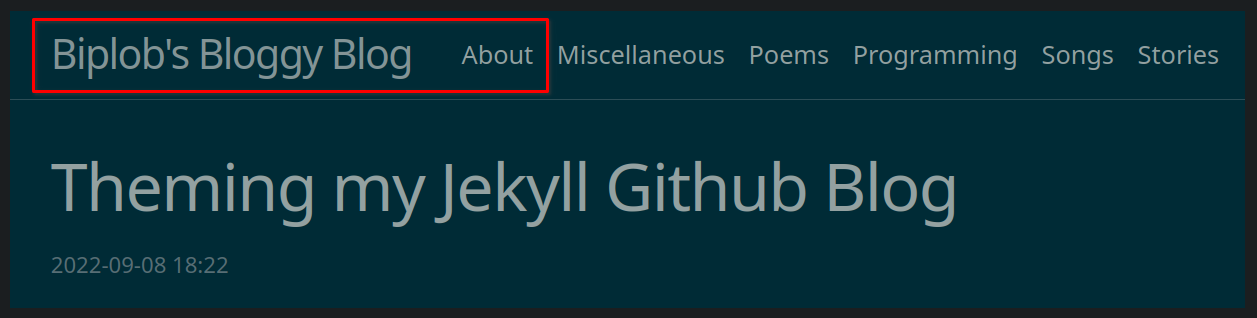
One of the breaking changes in v3+ at the time of writing was that the header spacing broke for me.
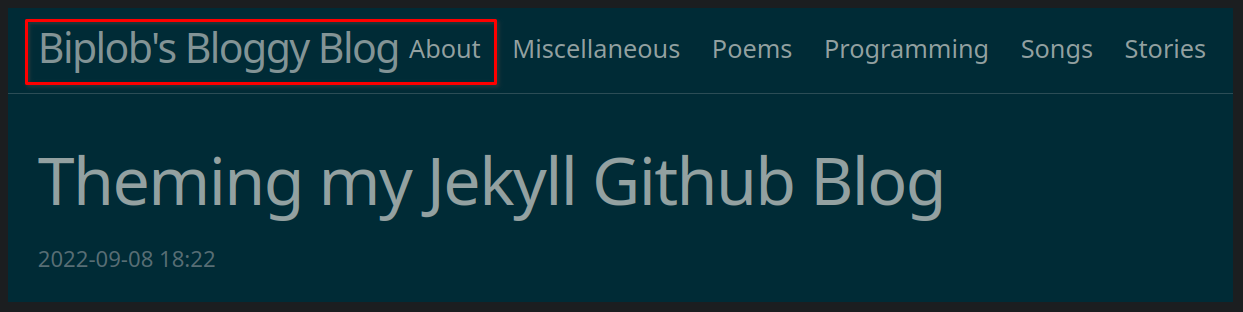
I overrode the CSS inside custom-styles.scss to correct that spacing.
Fixing Broken Social Links
Another thing that was causing an issue was my StackOverflow profile link was getting broken, i.e, on clicking the StackOverflow icon in the footer, the page it was sending me to was incorrect.
This was rectified inside _includes/social.html
{%- if social.stackoverflow -%}
  <li>
    <!-- The href link was corrected below: -->
    <a
      rel="me"
      href="https://stackoverflow.com/users/{{ social.stackoverflow  | escape }}"
      target="_blank"
      title="{{ social.stackoverflow | escape }}"
      ><svg class="svg-icon grey">
        <use
          xlink:href="{{ '/assets/minima-social-icons.svg#stackoverflow' | relative_url }}"
        ></use></svg
    ></a>
  </li>
{%- endif -%}
Additional Customizations
Custom Head
Some more content needed to be injected inside <head>
- <meta> keywords
- Google Site Verification <meta> tag
- Favicon
Previously, these were added directly inside _includes/head.html which overrode the default.
But, v3+ onwards, additional content could be placed inside _includes/custom-head.html
Custom Footer
Previously, the footer was populated with RSS, Author, Email, Site Description, and social links which made the not only dense, but also have an awkward layout.
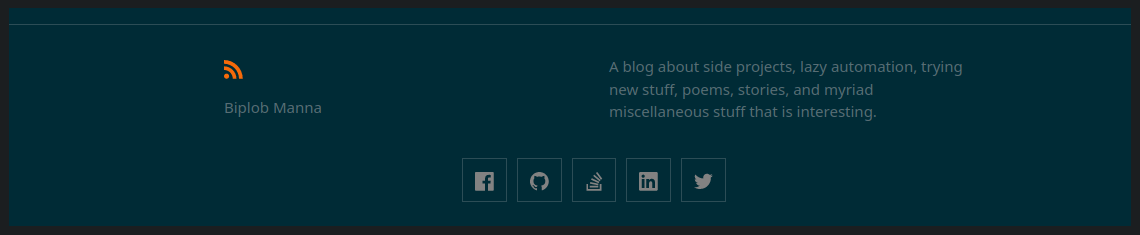
I simplified it so that, the current footer has RSS, author on the left, and the social links on the right.

Custom 404 Page
The default 404 page is simply bland, so I set about to customize it.
Researching for a free template that I could use to create my own 404 page led me to the CodePen for the page which I ended up using.
Credit and my thanks, goes to the original author.
There is a hidden <div> inside the 404 page which also credits the original author.
My Jekyll Blog modification is complete for now.
Check out the entire series of posts related to Blog Setup